Since I had such success last week with following the tips on Scratch, I continued onto the next type of animation they had on their list: animate your name. I had 6 sprites this time instead of only 2 in my dance off animation from last week. The coding was not as long because each sprite had a different coding pattern and did not depend on the timing of the other sprites. This time I made it so the sprites change only when the user clicks on them. Last time the sprites had coding that allowed them to move simply when you clicked the green flag for it to begin. This animation allows the user to interact with the sprites because you need to click on them for them to move. Otherwise not much happens. I was also able to embed my animation this time on here, so I don't have to do a screencast of the animation. (For some reason when I embed it on weebly it is blank on my draft post but once I publish it, its there!) Try it out for yourself below!
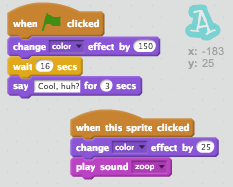
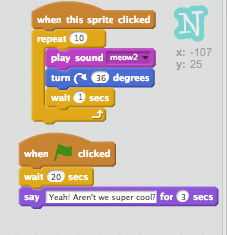
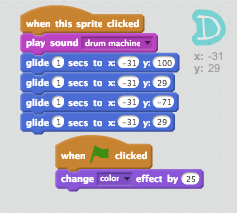
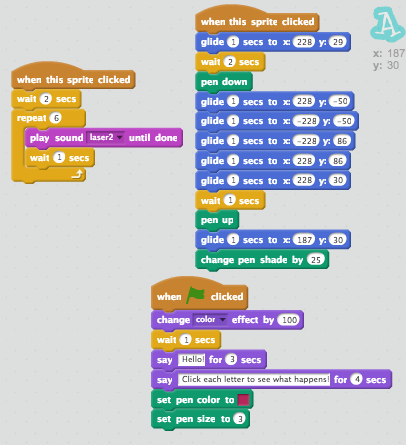
The new parts I learned to use this week were making the sprites change color (this requires a code, you don't just select the color), making the sprites glide around the screen using a coordinate grid (this required some math skills that I know would be awesome for my 5th graders to learn through coding) and how to change the sprite's sizes. I used the Tips section to help me animation letters A, N, D, and R. I still had two letters left in my name so I decided to experiment with those two. I first learned how to make the sprites "glide" by moving around the coordinate grid. I learned this with the help of the Tips section when doing the letter D. On the last letter A, I used what I had learned about gliding and added the "pen" feature which allows the sprite to draw. You would think this would have been really easy for me since I teach students how to use the coordinate grid, but it actually took some trial and error to get the pen to go exactly where I wanted it to. I definitely got better at understanding the pen feature though. And with the letter E I learned how to use the "point towards" feature which allows the sprite to flip and turn towards other sprites. Below is all the coding patterns for each letter. If you notice, one A has more coding than the other. The last A had the most coding because of all the moves I had it make on the coordinate grid with the pen feature. This is the one letter I did independently without the help of the Tips section. I'm pretty proud of this last letter!


I wanted to explore some more games this week as well so I could start trying to figure out what kind of game I would like to create. I played one game (below) in which you had to move the cube to avoid hitting the triangular pyramids. It gets progressively harder as the game goes on, so that's something I want to learn how to do. It's such a simple game, but I caught myself getting into the game and really trying hard to pass the pyramids. I went to comment on this game because it didn't have many comments and this pop up appeared:

I think having that pop-up there is VERY helpful. I was only going to say nice things to the creator, but if Scratch is being used by kids, it's definitely a helpful reminder.
And lastly this week, I created my very own game! It is a very simple game, and not challenging by any means, but I actually made one. The Tips section teaches you how to make a pong-type game, but I changed it to make it my own. You basically have to keep the soccer ball out of the goal using a paddle. I added the effects of changing the sprite color, moving, turning around, sounds, and new things like keeping a score and having the ball bounce off the paddle. Check it out below!